My first piece of advice is to use the raspberry pi all in one installer. Only after spending about 10 hours trying to get it setup for my regular linux server did i finally give in and switch. About 2 hours later (most of which was simply waiting for the installer) I had working installation on my rapsberry pi 2 with all the right permissions and virtual environments. It even had open z-wave control panel ready to start, which I would definitely be using.
Open z-wave control panel (ozwcp), was by far the most difficult part to get running correctly and then use. The good news however is that once you know how it works and what it's for, it's quite easy to reuse. Indeed i just added a new light switch to home assistant using ozwcp in under 5 minutes.
The purpose of ozwcp is simply to provide a gui for writing the z wave configuration xml file that home assistant uses later. These are the steps i have found to be most simple and effective.
Step 0: I find it's easiest to "include" my new z wave module into my z wave setup by doing this outside of ozwcp. Using the Aeon Labs Aeotec Z-Wave Z-Stick, Gen5 (ZW090) simply unplug the transmitter from your box and get in range of the new device. Press once to enable pairing mode, then pair with new device. Hopefully your device comes with instructions on how to include it in a zwave network. If successful, plug your transmitter back into the hass box and continue to step 1. If not, your new device probably doesn't have power/see other troubleshooting advice.
Step 1: Stop Home Assistant, either through the web app rest calls, or by killing the service on the box it's running on. If you can no longer hit the web page and instead see a 503, this should be enough.
Step 2: Start the ozwcp executable. In order to do this you'll need to ssh into your box running hass and cd to the directory where the ozwcp executable file exists. For me that is
cd /srv/hass/src/open-zwave-control-panel/
then run the executable on some port
./ozwcp -p 8888
Step 3: Point your browser to ozwcp 192.168.1.{hassBox}:8888
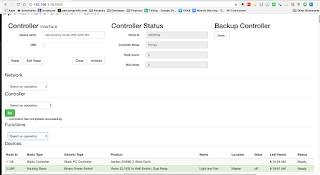
Step 4: Initialize your z wave transmitter device by looking up it's tty listing or by entering the id. There are plenty of instructions on how to do this, so i'll just skip to showing you what mine looks like.
/dev/serial/by-id/usb-0658_0200-if00
Theoretically this reference by id should never change and thus should always work. But sometimes i've found that it does not. In those instances, i tried looking up the tty listing (ls /dev/ttyACM*) and using that entry which then works. Remember not to check the usb button even though clearly mine says usb in the id.
Step 5: This is the confusing part because no one ever explains that after initializing you should see your z wave transmitter and any other device that's already included in the network. Granted, it's only confusing when it doesn't work, cause you are given no helpful directions as to what you should do next.

If nothing appears, something has already gone wrong and there is no point in playing with the buttons to try and make things appear. Some possible reasons are that your transmitter is not plugged in or needs to be reinserted. Make sure it shows up in the ttyACM* list. You could also try digging through the error logs, but the errors codes are completely cryptic and usually unhelpful.
As I said, when it works, it's pretty easy. All you have to do now is customize your devices. Use the functions drop down to set a name or location. Also note customizing is optional, but you should definitely be seeing your devices before moving on.
Step 6: This step is not optional and very important. Make sure you press save under the Backup Controller menu. This is what actually writes your devices to the z wave xml that home assistant looks up.
Step 7: Close ozwcp and start hass
sudo systemctl start home-assistant.service
Step 8: If discovery is off, add a configuration entry and name it however you want.
sudo nano /home/hass/.homeassistant/configuration.yaml
Once it boots up and you can see the web page, look under the dev-state page to see your device. You'll need to use the Entity name when referencing this device in your hass config. Usually it's something like light.__level_4_0 or switch.vision_zl7432_inwall_switch_dual_relay_switch_3_0
Here's an example configuration entry.
customize:
    switch.vision_zl7432_inwall_switch_dual_relay_switch_3_0_2:
      friendly_name: 'Master Lights'
      icon: mdi:lightbulb
Fortunately there are plenty of examples and the documentation is pretty well covered on what things mean.
That's it!